Installing wood paneling is a straightforward DIY project. With the right tools and techniques, you can transform your walls. This guide covers various types of wood panels and installation methods — we’ll walk you through each step, from preparation to finishing touches. WoodenAve offers quality panels for your next wood wall installation project.
Key Takeaways
- Measure walls and plan panel layout before starting.
- Prepare surfaces by cleaning and removing obstacles.
- Choose between adhesive and nail or screw installation methods.
- Use proper tools for cutting and securing panels.
- Apply finishing touches like caulk and paint for a polished look.
Types of Wood Paneling
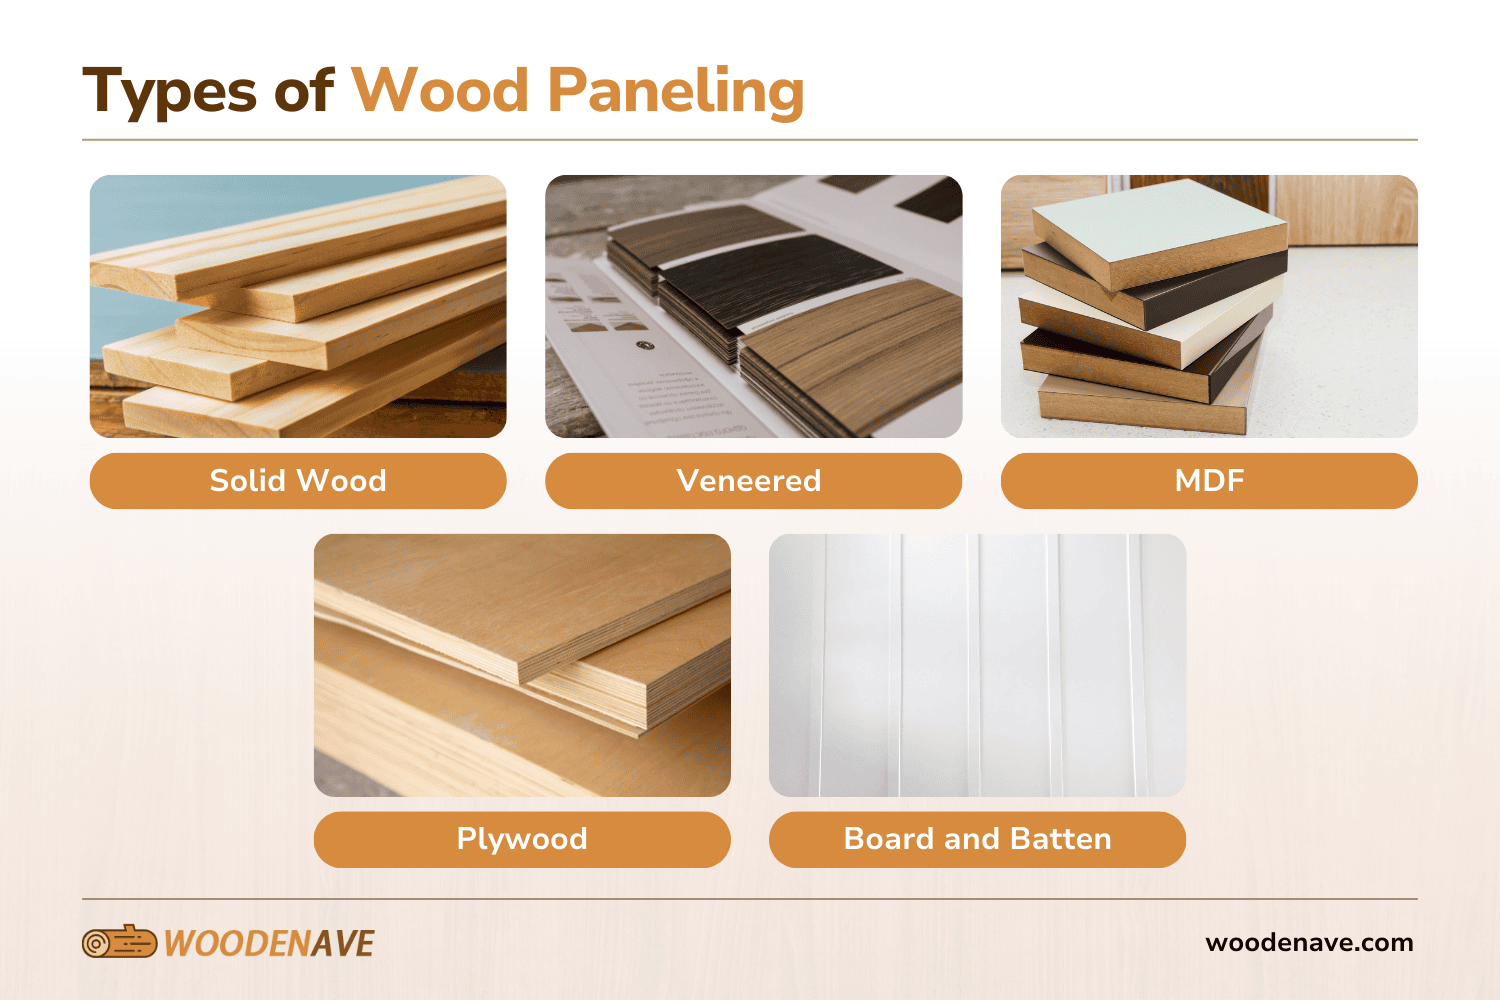
Wood paneling comes in various styles and materials, such as solid wood and veneered panels. Each type offers unique benefits and aesthetics:
- Solid wood panels: Natural, durable, but expensive
- Veneered panels: Real wood look, more affordable
- MDF panels: Budget-friendly, uniform appearance
- Plywood paneling: Versatile, easy to work with
- Board and batten: Creates a classic, textured look
Consider factors like durability, moisture resistance, and ease of installation when choosing panels.
1. Preparation
Start your preparations for adding wood panels by gathering essential tools and materials. Clean and assess your walls for any repairs needed. Measure accurately to determine the number of panels required.
Tools and Materials
Here’s an outline of essential items for wood panel installation:
| Tools | Materials |
| Tape measure | Wood panels |
| Level | Adhesive |
| Pencil | Nails or screws |
| Saw | Wood filler |
| Drill | Sandpaper |
| Hammer or nail gun | Caulk |
| Safety gear | Paint or stain |
Wall Preparation
Remove any existing trim and outlet covers. Sand down protrusions and clean the surface thoroughly. Repair any damaged areas or loose tiles. Allow your walls to dry completely before your wood panel installation.
Measuring and Planning
Measure the room circumference and divide it by four for your panel count. Remember to account for windows, doors, and openings. You’ll also need to calculate square footage by multiplying width by height. Finally, plan your panel layout to minimize waste and consider starting in a less visible corner.
2. Installation Methods
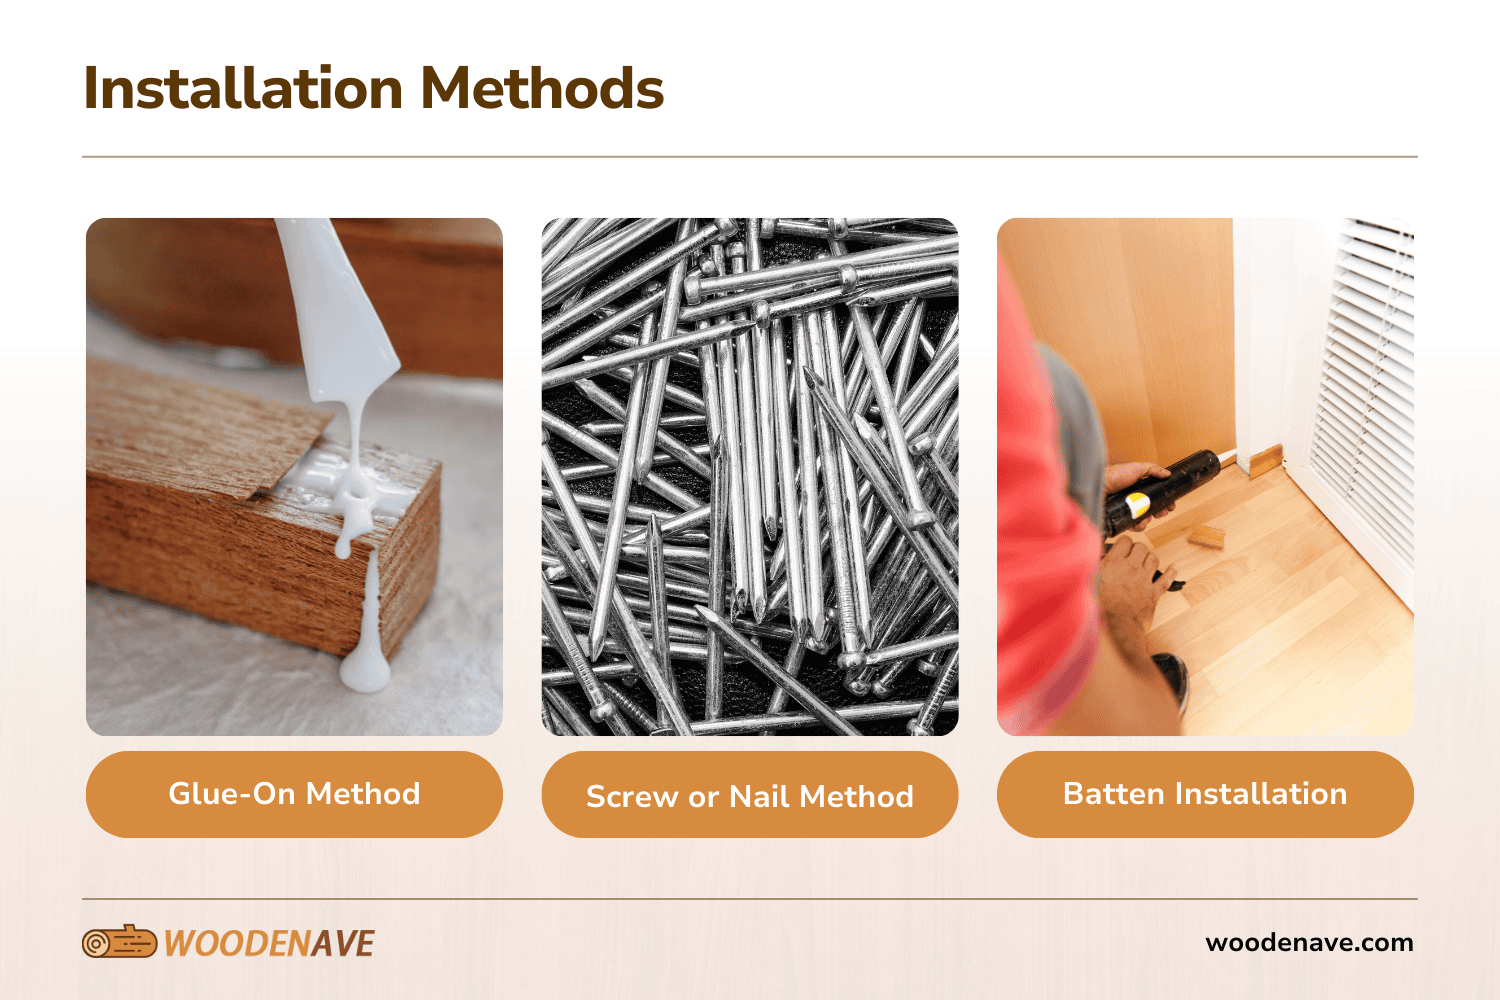 When considering the wood veneer hub installation for wall paneling (and other materials), common installation methods include glue-on, screw or nail, and batten. According to Angi’s report on wall panels, the cost to install wood paneling in a 12-by-12 room is between $1,000 and $15,000, so sometimes it’s better to just DIY it!
Glue-On Method
The glue-on method works well for most wood panels. Apply adhesive in a zigzag pattern on the panel back. Position the first panel and ensure it is level. Press firmly against the wall and use a rubber mallet to secure it. This method is ideal for smooth, even walls and provides a seamless finish.
Screw or Nail Method
For added security or uneven walls, use screws or nails. Locate and mark wall studs using a stud finder. Pre-drill holes in panels if using screws. Secure the panels with nails or screws at the stud locations. You could also use finishing nails or an air nail gun for a cleaner look. This method offers strong support and allows for easier panel removal if needed.
Batten Installation
Board and batten create a classic, textured look. Secure the horizontal base and top rails. Determine spacing for your vertical battens. Next, cut and install vertical battens between the rails. Finally, add trim pieces to finish the look. This style adds depth and character to your walls, which makes it versatile for various room types.
3. Veneering Techniques
Veneering allows for unique wood panel designs. The contact cement method creates a strong bond for smaller areas. Apply cement to both substrate and veneer, allowing it to become tacky before joining. For larger projects, consider the vacuum press method for even pressure distribution. This technique ensures strong adhesion and a professional finish.
4. Finishing Touches
After installation, fill gaps and sand for a smooth finish. Use wood filler for nail holes or small gaps, and sand smooth with fine-grit sandpaper. Apply caulk along seams and edges to seal and prevent moisture intrusion. Remember to choose a finish that protects your panels and enhances their beauty. Consider using a caulk gun for precise application and a perfect finish.
5. Troubleshooting
Uneven walls can complicate installation. Use shims to level panels on uneven surfaces. Or, consider using a plywood substrate for severely uneven walls. You can address moisture concerns by using moisture-resistant panels in bathrooms or basements. Allow the wood to acclimate to room conditions before installation, regularly inspect your panels for signs of moisture damage, and address issues promptly.
WoodenAve: Affordable Wood Paneling
WoodenAve offers high-quality, affordable wood paneling options. Our products suit various styles and budgets. We provide expert advice and installation tips. Contact us to transform your space with beautiful wood panels today.
How Do You Install Wall Paneling? | FAQs
What is the best way to attach wall panels?
The best method for wood panel wall installation is using both construction adhesive and nails. Apply a strong adhesive in a zigzag pattern on the back of each panel before pressing it firmly onto the wall. Secure the panel further by nailing or screwing it along the edges and into the studs. For heavy panels like an acoustic wood wall panel, use a brad nailer or screws every 12 to 16 inches for maximum hold.
Can paneling be installed directly on studs?
Yes, wood wall paneling can be installed directly on studs if they are evenly spaced. A sheet of plywood or drywall underneath provides additional support for decorative panels. Acoustic slat wood wall panels may need extra backing to enhance stability and performance. Always check stud spacing and secure panels properly for long-lasting results.
Can I use both nails and glue for securing wood paneling?
Yes, combining nails and adhesive is a reliable method for wood wall panel installation. How to install wood veneer on wall surfaces depends on applying glue evenly before fastening. Acoustic wood wall panel options often require both methods for optimal adherence. This combination prevents warping and ensures panels stay securely in place.