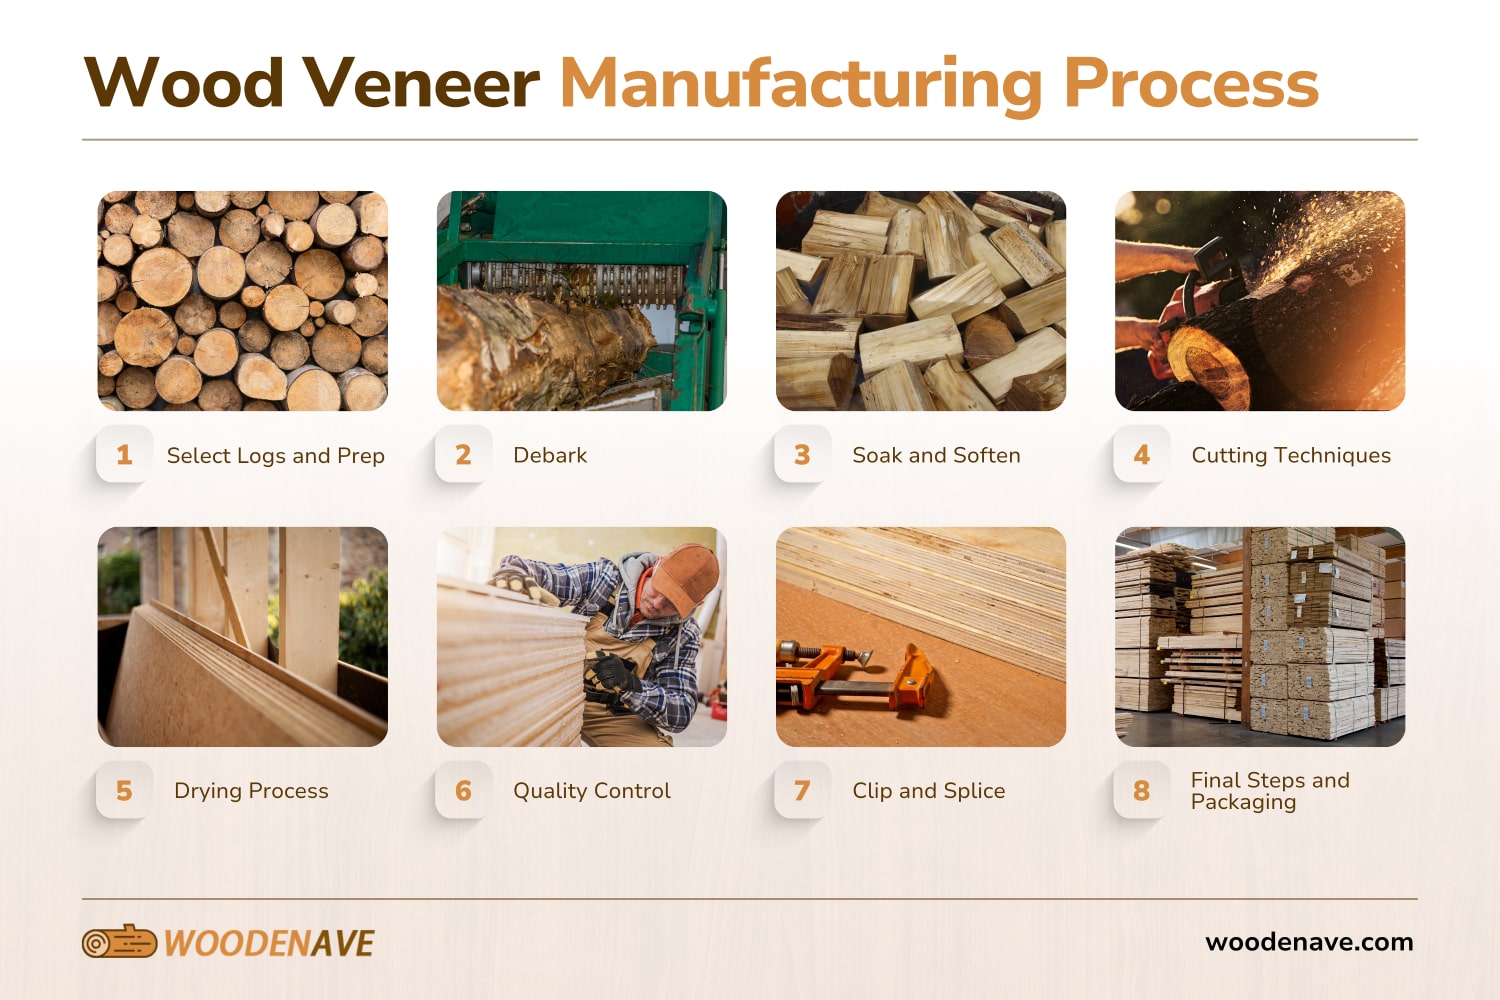
The process of creating wood veneer involves several steps: selecting and preparing the log, debarking, soaking, cutting into thin slices, drying, quality control, clipping, splicing, and finally packaging. This careful process ensures that each sheet of veneer shows the natural beauty of the wood grain while minimizing waste.
WoodenAve is expertly skilled in providing high-quality wood veneer products that improve the aesthetics of various applications. Our guide explains how are wood veneers made in full detail.
Key Takeaways
- Wood veneer is made by slicing logs into thin sheets using various cutting techniques.
- Selecting high-quality logs is important for producing high-quality veneer.
- Soaking logs softens fibers for cleaner cuts during slicing.
- Quality control measures ensure only top-grade veneers reach consumers.
- Proper packaging protects veneer sheets during transport.
Wood Veneer Manufacturing Process

| Step | Details |
|---|---|
| 1. Log Selection and Prep | Select quality logs; store with controlled humidity to maintain integrity |
| 2. Debark | Remove bark smoothly to prevent contamination and ease slicing |
| 3. Soak and Soften | Soften logs with water or steam for cleaner, thin slicing |
| 4. Cutting Techniques | Use rotary, flat, quarter, or rift slicing to achieve various grain patterns |
| 5. Drying Process | Air-dry to prevent warping, ensuring stability and integrity |
| 6. Quality Control | Inspect for defects, reassemble to match original grain patterns |
| 7. Clip and Splice | Trim and splice to standard sizes, often attached to plywood or MDF |
| 8. Final Steps and Packaging | Measure, label, and package to protect against damage and control moisture |
1. Log Selection and Preparation
Before we get into how is wood veneer made, it’s important to understand the preparation needed for wood veneer sheets. This process begins with choosing the right solid wood and then managing the log yard.
Choosing the Right Wood
The foundation of quality wood veneer begins with selecting the right type of wood. Factors such as species, size, straightness, and visible defects are important when considering how wood veneer is made, as this will determine the suitability of logs for veneer production. Common wood species used for sliced veneer include oak, maple, cherry, and walnut, each of which offers distinctive appearances and properties. The quality of the logs directly impacts the final product, so manufacturers often prioritize logs with minimal knots and blemishes.
Log Yard Management
Once the logs arrive at the facility, they are classified by species in a log yard management system. Proper management ensures that logs are stored under the best humidity conditions to prevent degradation. Maintaining the right environment is essential for preserving the integrity of the wood until it is processed into thin sheets. This careful handling prepares us for producing high-quality veneer that meets industry standards.
2. Debark
Next up is the debarking! Debarking is an essential step in preparing logs for veneer production. Specialized machines are used to remove the bark without damaging the underlying wood. This process is important, as bark can have insects and fungi that might compromise the quality of the veneer. An even, accurate debarking makes sure that no remnants remain on the log, which could affect cutting processes.
Even debarking improves the aesthetic quality of the final product but also allows for smoother slicing of the pieces of wood during later stages. By ensuring that all bark is removed, manufacturers can get a more consistent thickness in their veneer sheets. This attention to detail contributes to the overall quality and appeal of the finished veneer.
3. Soak and Soften
Before the material is cut into thin slices of wood, the logs go through a soaking or softening process to prepare them for cutting. This involves immersing logs in water or exposing them to steam at temperatures ranging from 80 °C to 100 °C for between 12 and 72 hours. Soaking helps to soften the fibers within the wood, making it easier to slice into thin layers and sheets of wood without causing damage.
The softening process is important, as it reduces stress on the wood during slicing, allowing for cleaner cuts and minimized waste. When logs are properly softened, they yield thinner slices of wood with fewer imperfections. This results in higher-quality sheets of veneer that showcase the natural beauty of growth rings and grain veneer patterns.
4. Cutting Techniques

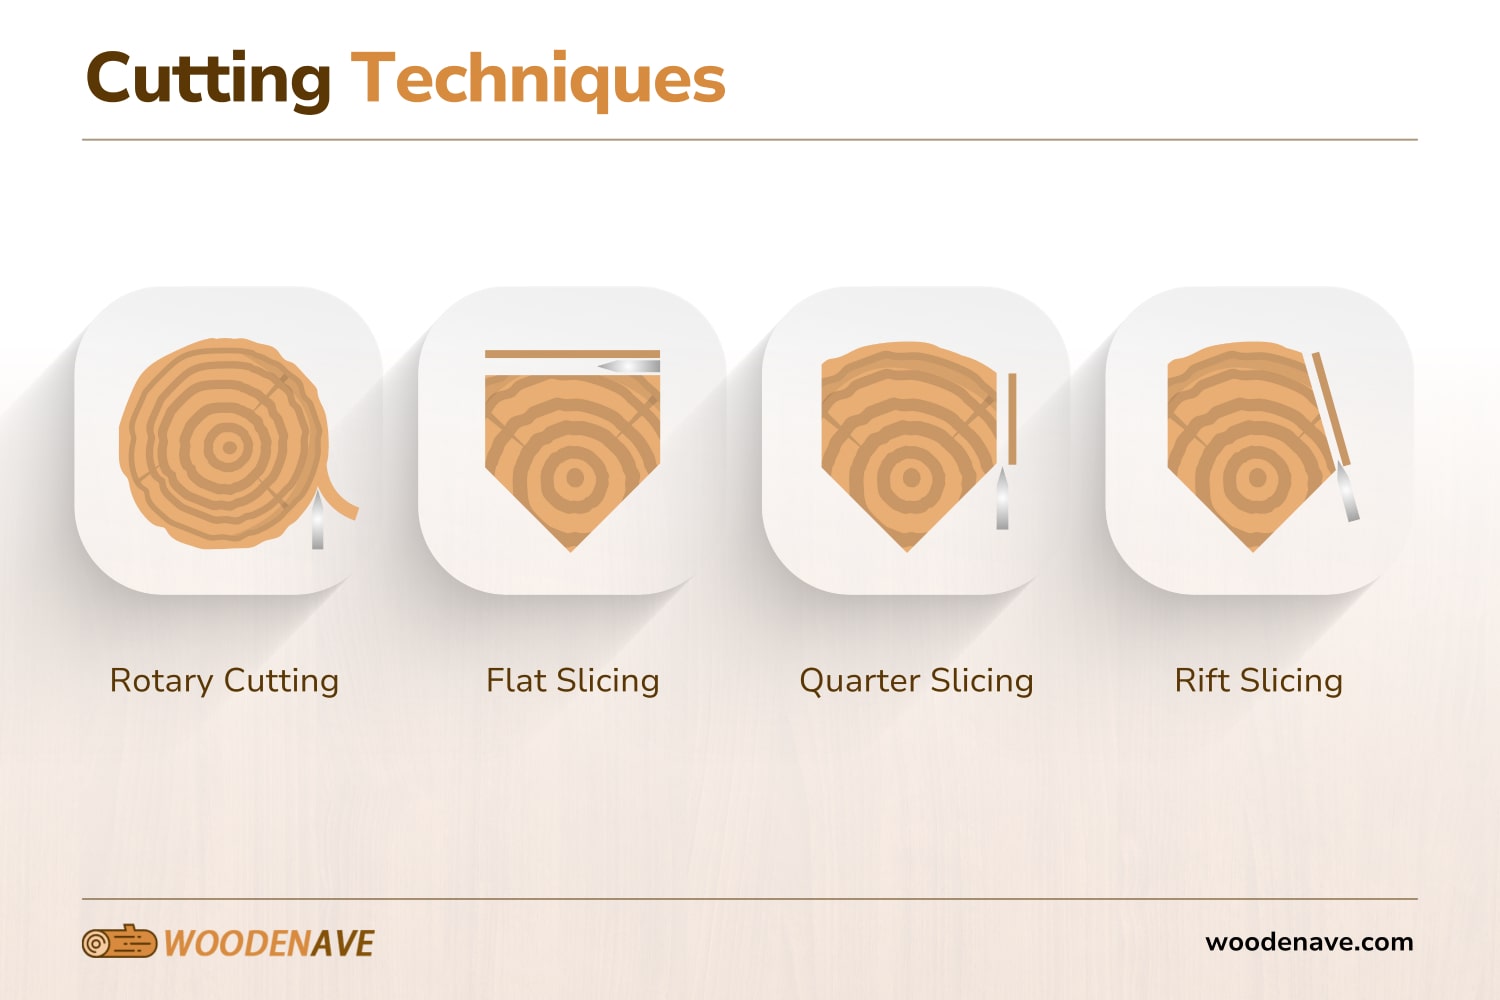
The cutting techniques used in veneer production influence its appearance and characteristics. Here are a few common methods for cutting veneers.
| Technique | Description | Grain Pattern |
|---|---|---|
| Rotary | Continuous slicing around log for wide sheets | Varied |
| Flat | Straight cuts for appealing grain | Cathedral |
| Quarter | Sliced from log quarters for straight grain | Straight |
| Rift | Angled cuts from quarters for comb-like effect | Linear, comb-like |
- Rotary Cutting: In this method, a log is mounted on a lathe and rotated against a sharp blade, veneer peeling off layers in one continuous roll. This technique produces wide sheets with varied grain patterns on the veneer face.
- Flat Slicing: Straight cuts across the log reveal a cathedral grain pattern that many find visually appealing.
- Quarter Slicing: By cutting quarters from the log before slicing, this method produces straight-grained patterns ideal for certain applications.
- Rift Slicing: This technique creates a comb grain effect by cutting at an angle at which the wood is cut from quartered logs.
Each slicing method brings about different grain appearances and thicknesses in veneer sheets, similar to natural wood. For example, rotary-cut veneers are often wider but may have less uniformity compared to flat-sliced options. Understanding these differences allows manufacturers to customize their products to meet specific design needs while maximizing aesthetic appeal.
5. Drying Process
After slicing into thin sheets, drying is essential to ensure that veneer remains flat and stable over time. Proper drying techniques help prevent warping or cracking that can occur if moisture levels are not adequately controlled.
High-velocity air drying is commonly used in commercial settings to speed up moisture removal while maintaining quality. This method circulates warm air around the sheets, promoting even drying without compromising structural integrity. The result is high-quality wood veneer sheets ready for further processing.
6. Quality Control
Quality control is important in ensuring that each sheet meets industry standards before reaching consumers. After drying, experts inspect each piece for defects such as warping or discoloration. Reassembling sheets in their original order helps maintain consistency across batches of timber veneer.
Following strict quality control measures guarantees that only top-grade veneers are available for sale. Manufacturers like WoodenAve often follow guidelines set by industry organizations to ensure our products meet consumer expectations regarding durability and appearance.
7. Clip and Splice

Once inspected and approved, veneers go through clipping, where they are trimmed to standard lengths and widths using specialized clippers. This step ensures uniformity across all pieces before they are packaged for sale.
To create larger sheets or specific designs, splicing techniques come into play. Different matching methods — such as book match or slip match — are used to join pieces seamlessly together while preserving visual continuity across grain patterns. Keep in mind that almost all wood veneers would also have to be placed on plywood, MDF, or particle board.
8. Final Steps and Packaging
After clipping and splicing, finished veneers are carefully measured and labeled before being packaged for transport. Protective packaging materials help prevent damage during shipping, while ensuring that customers receive their products in the best possible condition.
Proper packaging protects against physical damage and also maintains moisture levels within acceptable ranges during transit. This attention to detail ensures that customers receive high-quality wood veneer ready for installation or further processing.
WoodenAve: Premium Wood Veneer Suppliers
Understanding how wood veneer is made provides insight into a sophisticated process that combines art with science to produce beautiful materials for various applications. At WoodenAve, we offer a wide variety of premium wood veneers crafted through these detailed steps, ensuring both quality and aesthetic appeal in every sheet supplied.
Our collection ranges from natural and engineered veneer to backed, rolled, and specialty veneer. If you’re ready to get your project started, contact us!
FAQs on How is Wood Veneer Made?
Is wood veneer real wood?
Yes, wood veneer is real wood, as it is made by slicing thin sheets from logs. Veneer refers to these layers, often used to cover furniture surfaces while preserving the natural look of wood. Engineered veneer is manufactured from refined wood fibers, expertly bonded and dyed to mimic natural wood grain with a seamless, consistent finish.
What kind of wood is used for veneer?
Veneer can be made from various hardwoods like oak, walnut, and cherry, each selected for its unique grain and color. These are cut from large rectangular blocks of wood, typically using techniques like rift cut for consistent grain. Slices of veneer are always kept aligned to ensure consistent patterns across large surfaces.
Is wood veneer environmentally friendly?
Yes, wood veneer is considered environmentally friendly since very little wood is wasted, and it allows for efficient use of timber resources. For added durability, phenolic backed veneer is less common but offers enhanced stability for projects. To learn how wood veneer production reduces environmental impact, explore sustainable practices in veneer manufacturing by getting in touch with us.
Back to Top: How is Wood Veneer Made?
